
Hiking · Independent guide
Oeschinensee Hike: Choose a Route That Fits
Travel facts checked
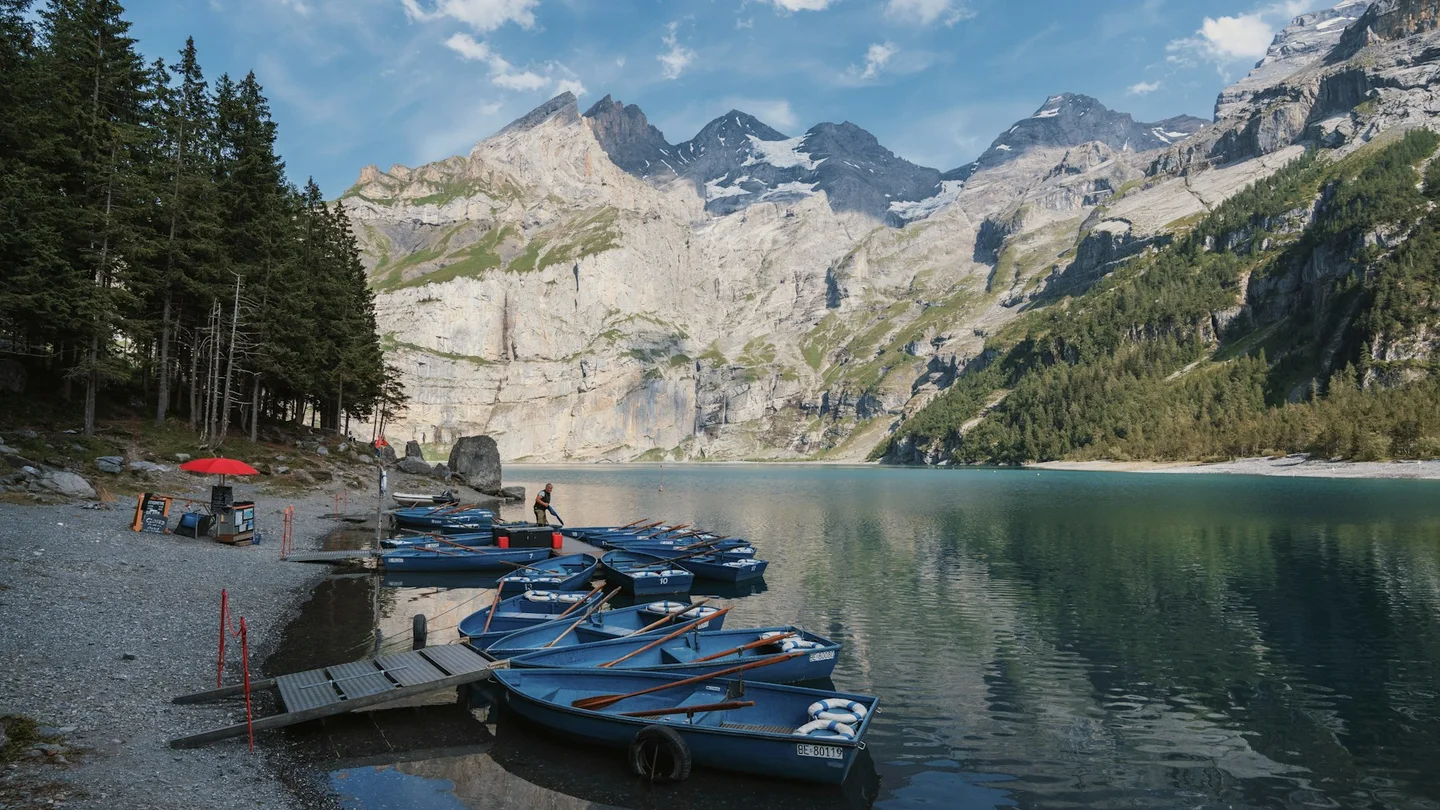
Choose a shorter shore walk, the uphill approach or a high mountain route. Compare terrain and return timing before setting out.
In this guide10
- Oeschinensee hike choices at a glance
- The short lake walk from the upper station
- Hiking up from Kandersteg
- Oeschinensee hike on the high panorama route
- Read the route markings
- What to pack for the route you chose
- Weather, snow and current closures
- Plan the return before the first step
- Hiking questions
- Oeschinensee hike verdict
An Oeschinensee hike can mean a short path from the upper gondola station or a demanding route above the lake. Pick by the terrain and the return journey, not by the photograph you want. The easy walk, the uphill approach and the Heuberg panorama route ask different things of you.
This page helps you choose among those outings. Detailed directions for the higher route and the walk from the village have their own guides, so you do not mix one route's timings with another route's demands.
For a first visit, take the lift and use an open signed path to the shore. Walk up from Kandersteg only if the climb fits your day. Choose the Heuberg mountain route when you have sure footing, a head for heights and good conditions. Check every planned trail segment before setting out; an open gondola or lakeside path does not prove the higher route is open.
Oeschinensee hike choices at a glance
Choose one main walking goal before you buy transport. These route types are useful starting points:
- Upper station to the shore: the shorter lake-access choice, with easier signed paths when open.
- Kandersteg to the lake: a sustained uphill approach that uses energy before the lakeside visit begins.
- Heuberg and Oberbärgli: a mountain route with narrow and exposed terrain, suited to experienced hikers.
- Longer alpine routes: separate mountain plans that need their own gear and skills, with separate checks of current conditions.
The operator's hiking page, checked 14 October 2026, separates easier hiking paths from mountain and alpine trails. Use those categories when you read a route. A route label that says panorama describes a view, not a low level of difficulty.
The panorama hike page covers Heuberg. The village approach page handles the climb from below. Return to the Oeschinen Lake guide if you want a shore visit without making the hike the main event.
The short lake walk from the upper station
The direct path C is the simpler option after taking the lift. The checked hiking status list gives it roughly 25 minutes and describes it as suitable for pushchairs. That applies to that path, not to every trail beside or above the water.
The operator also lists path D through Läger at around 35 minutes. It is a different easy-path option from the high Heuberg trail G. If you have seen a blog call both a panorama trail, read the letters and endpoints rather than trusting that shared label.
Allow more time than the listed walking estimate if your group stops for photographs or rests. The shore is the destination for many visitors, so there is no need to keep adding paths once you arrive. Save time and energy for the walk back towards the upper station.
For mobility needs, check the current surface and gradient, then confirm the service details before travelling. A pushchair description does not establish step-free access to every viewpoint or boat, or to each place serving food. The easiest route may still feel demanding for someone who needs a level, smooth surface throughout.
Hiking up from Kandersteg
Walking up saves an ascent ride but adds a real climb. The live path information listed route A from the lower station to the lake as open on the checked date, at about 90 minutes with 450 metres of climb. It recommends hiking boots and says no pushchairs.
Those figures start at the lower station. If you begin at the train station, you still need the approach through the village. Add that time to your total, along with rests and the lake visit. A fast ascent estimate from someone else's trip is not your group pace.
Path B at Huble was listed as closed because of construction, with no continuous route. Keep it out of the plan. A saved track that follows B can be out of date even if its map line looks clear. Turn away at closure signs and do not enter a work zone.
Decide how you will come down before starting the climb. If you want the gondola descent, check the single ticket and last ride. If you want to walk both ways, judge your downhill footing and fatigue as well as your ability to climb.
Oeschinensee hike on the high panorama route
The Heuberg route goes through higher mountain terrain towards Oberbärgli, with views over the lake. The operator describes it for experienced hikers with strong stamina and a head for heights. It is a step up from the short lake-access walk.
Trail G's checked time of about one hour and fifteen minutes refers to the Läger–Heuberg–Oberbärgli segment. It is not the complete day, including the upper station, return sections and breaks, plus a shore visit. Treat each listed segment as a segment.
A narrow path can feel much harder than its distance suggests. Exposure, loose ground and wet rock matter even when the climb looks moderate on a map. If any person in the group feels uneasy with a steep drop, choose the lower plan before you reach the difficult part.
Read the Heuberg planning guide before using a route track. It sets out the direction decision, the current path checks and the reasons to turn back. Do not assume that a high loop provides a safe circuit around the entire lake edge.
Read the route markings
Yellow hiking signs cover the easier hiking category. White-red-white marks identify mountain hiking routes, where sure footing and suitable shoes matter. White-blue-white marks belong to alpine routes with much greater demands. The hiking guidance explains those categories and their requirements.
The colour system gives you a starting point, not a full guarantee. Even easier paths can have uneven surfaces. Mountain weather can change the demands quickly. Match the route to the least experienced person in the group, not the strongest walker.
Learn the endpoints on your chosen route before leaving. A sign towards a hut or a pass may lead away from the lake-access path. If a marker or junction does not match your plan, pause to check the map while you are still in a safe place.
What to pack for the route you chose
Pack enough water and food for the time you will be walking. Do not depend on a mountain kitchen being open at the exact time you need it. Keep a warm layer and rain protection even when the start is bright. The higher route can feel very different from the village.
Wear shoes with grip suited to the path. The operator recommends hiking boots for the uphill approach and proper mountain gear for the higher trails. Poles may help some walkers, but they do not replace sure footing or make exposed terrain suitable for every person.
Keep an offline map and a charged phone. The route must still make sense when a mobile signal drops. Note the lift return time separately from the walking track. Leave room for a slow section or a decision to retrace your steps.
Bring only what the route needs, but do not leave out essential layers to lighten the bag. Water and food, a map and good footwear are more useful than packing several cameras. Take photographs from safe standing places rather than stepping towards an edge for the frame.
Weather, snow and current closures
Check operating status for the specific trail letters and segments you plan to use. Then compare the forecast and webcams with the terrain. A sunny view of the lake does not show whether the high path has snow or ice, or wet rock.
Delay a high-route plan if cloud removes the visibility you need or weather makes exposed ground unsafe. Choose the shore path only if its own access remains suitable. A lower route is a good alternative when you select it in advance, rather than after the group is already tired on a high traverse.
Summer route advice does not cover winter travel. Snow can hide waymarks and change the risk even on ground that looks familiar. Follow the separate winter route information. Never infer that an ice walk is open from a photograph of people on the lake in another year.
If you stay overnight, a flexible base can give you more choice between weather windows. Compare the Kandersteg stay options and read the village guide for other plans that do not depend on a high path.
Plan the return before the first step
Set a turnaround time based on daylight and the descent service, using your slower likely pace. A late start should mean a shorter route. Do not try to recover time by skipping breaks that the group needs or taking an unsigned shortcut.
Walking down still takes effort. Tired legs can make loose or steep ground more difficult after an easy climb. If your plan combines walking up with Heuberg, add the demands of both; the panorama route does not reset your energy at the lake.
The village offers a useful point to regroup after the hike. Check meal timings before you leave the mountain if you want dinner soon after returning. Carry a snack so that hunger does not force a rushed descent.
Hiking questions
Which walk is best for a first lake visit?
Use the shorter signed path from the upper station when it is open and fits your mobility needs. It lets you focus on the shore without adding the long climb from the village. Read the current surface and access notes rather than assuming every nearby path is equally easy.
Can I hike the whole way around the lake?
Do not assume a continuous easy shoreline circuit. The high panorama route uses mountain terrain and is different from the short shore paths. Follow a current mapped route with confirmed open segments; a lake outline on a map does not establish a safe path beside every part of the water.
Does the gondola being open mean the panorama hike is safe?
No. The lift and each walking route have separate statuses. Check the segments of the higher route, the forecast and the surface conditions. The ride may be operating while a path is closed or unsuitable for your group, so decide on the hike using route-specific evidence.
Can I combine the uphill walk and panorama route?
Only if the full climb and distance within the time available fit your experience and fitness. Add the approach, mountain sections and rests, then the descent into one day. Do not use a quoted time for one segment as the full outing, and keep a shorter alternative if the ascent takes longer than planned.
Oeschinensee hike verdict
The right Oeschinensee hike is the one your group can complete with margin. Choose the short shore path for an easier day, the village approach for a sustained climb, or Heuberg for a prepared mountain outing. Verify the exact route, protect the return time and change the plan when conditions demand it.